Search Results
394 results found with an empty search
- How we filmed "The Boxer"
Behind the scenes feat. Anissa Benyoub The Mavo edge 6k is a fun and capable cinema camera. I believe it shines when used with at least a first AC. You can definitely use it solo like I did for this short portrait video. But I don't think it is the best choice if this is how you mainly work. It’s the Versatile nature of this camera that makes it interesting, as it can be used also on larger, bigger projects. Let’s see how I used it during this portrait of French boxer Anissa. French Champion Anissa is the first female boxer I photographed , and now the first I filmed. It has been a while since I’ve worked with athletes, and I hope this will change in the near future. For the majority of the making of this film I operated the Mavo edge 6K alone . The only part that wasn't shot with the camera is the sequence inside the ring with the 2 trainers. Figuring out a schedule that fit everyone was tough (like always) and when we finally settled on a date, the camera was already sent back to its owners… I do not own the MAVO. Thanks Kinefinity Europe for the loan! We didn't go for a realistic look, it is not a documentary. That’s why we went heavy with the smoke… maybe a bit too much when I think about it. We also cheated a bit with the light but still tried to keep the natural direction of the light coming from the windows. We used the GODOX TL 120 led lights on this one, as they were easy and fast to set up. And for the shadow boxing on the ring I added a spotlight with the Aputure 300X camera left. The spotlight gave me that extra reach to be able to place the light out of frame. Outdoors, it was a no brainer, we worked with only natural light. For the final scene on the ring I had to use the NANlite Forza 500 and the Lantern 90 with its skirt. The power helped us knock down the ambient light and get the look we wanted. We only had 15 minutes to shoot this sequence with the athlete and both trainers. It was a really fun ride, given the time and resources we had, I am quite pleased with the end result. But the goal here for me was to learn a bit more about the tools I need for the type of short films and videos I want to create. If you missed my initial thoughts on the Mavo edge 6k , click here: My experience with the MAVO edge 6k. If you missed, down below is the final video! The Boxer Athlete: Anissa Benyoub Trainers: Adama Diarra et Richard Awoonor A film crafted by Haze Kware 1st AC: Marlène Blackdough Music: Everyone has a breaking point by Kooma Filmed at Boxing Toulouse bagatelle - Gymnase de la faourette Special thanks to la mairie de la ville de Toulouse Part of the series of videos filmed with the Kinefinity Mavo edge 6K
- Simple portraits with Scrims & Flags
the GODOX scrim & flag kits I cannot believe it took this long to actually play with these and make a video about them. In this video I am going to show you some basic setups using scrims and flags, and show you how you can easily control and shape your light. Scrims and flags… what are they? A scrim is basically a material that you place between your light source and your subject that will allow you to reduce the light or diffuse it. There are different sorts and sizes, the ones you will use will of course depend on the project you are working on and the desired effects. I will be using the Scrim and flag kits by GODOX. The SF6090kit and the SF4560kit. 60x90cm and 45x60cm being of course, the size of flags and scrims. This is what both kits consist of: One black single and one black double net to help you reduce the highlights on your subject. It can help reduce the contrast, you can balance your image and more. We also have a one stop silk screen, the name of it says it all, it will reduce your light by one stop and also diffuse your light. This will reduce and soften your shadows giving you a less harsh look, of course, if you wish to. A black block solid flag that can cut or block the light… I often use this as a negative fill too… but more on that later. And finally a 2 stop silk screen to further diffuse your light and for an even softer look… I also use it as a white bounce… You also have these fingers and dots, that act just like the scrims I just mentioned but will cover smaller surfaces and areas. You have Industry standard color borders to easily identify them, and these are open flags which means you have an open border with no binding for softer transitions. There is no right or wrong way to do things, or almost. Remember these are tools, be creative, think out of the box, these scrims and flags will surely help you get the look you want in your future creations. For my portraits, I often work on location, working both outdoors or indoors with a temporary setup. I sometimes don’t have a lot of space, not many options for backdrops and backgrounds so I have to compose with what I have. And this is when these kits can become useful. I have now the ability to have a little bit more control over my light, giving me more freedom. I wanted to use parts of the textures in the bushes, and the plants in the garden. The light was already a problem but thanks to the black solid flags I was able to block it in specific areas and make my scene work. Here is what we had to work with : The 2 solid black flags are blocking the light giving us an even exposure. I then added the One stop silk to diffuse my light. For this 2nd example we build upon this initial setup. Same background but slightly different angle. I wanted to get rid of the dappled light, so again we used both Black solid flags to block it. Once the flags were in place, we had an even exposure again. You can see a bit of light coming from behind. It is highlighting her hair, her back, but I felt we could add a touch of that light on the right side of the image, on her left cheek. So I added the 2 stop silk screen but instead of diffusing the light with it, I used it as a white bounce. On the left (1st image) there is no white bounce: It was almost 11 oclock, the sun was high, and hitting hard. Without any accessories, this is the type of light you’d get. I want it to be softer, and most importantly I wanted to balance my image so that we could actually see the colours of the tree behind her. For this one I added a 2 stop silk for the face placed high up because of the angle of the sun, and a black flag to block some of the dappled light at the bottom half of the image. Finally, I added another solid black on the other side as a negative fill, to suck out a bit of light and to give me some shadows on the face for more depth. All three versions side by side: Now lets go inside and see what we can do in a home studio setup One thing I always struggle to do is photographing white clothes with light skin people. Usually the face is exposed correctly, but the shirt, or white outfit is slightly overexposed. One way to correct this though is by using a net. Single or double it’s up to you. Use the open side of the flag for a smooth transition. I once again added a double stop silk as a bounce (camera right), and then replaced it with a solid black as a negative fill. Which one do you prefer ? I wanted to keep that hard light look but not too much, plus, I wanted more control on my backdrop, I wanted it to be darker. We are still playing with only one light, here are some of the combinations we did. One stop silk for the face and a solid black flag to control the light on the backdrop and another solid black used as a negative fill. Same configuration but I replaced the negative fill with a white bounce to fill up those shadows. And finally this is what this scene looks like without any flags and scrims. Lets compare all three: I am using the GODOX AD1200pro bare bulb here… but of course you can always go further and use any light shaping tools with your light for more control. For this next one we already know what to do for the white shirt. A single black net will do. This is before, the white shirt is slightly clipping: And this is with the addition of the net: I am diffusing my light with a one stop silk. and once again used a Black solid flag as a negative fill. Side by side (note that the last 2 use the same set up): Can you guess what I used here? No accessories : Diffusion, net, and white bounce: Diffusion, net and solid black: Now let’s take this final pose and see what I would typically do. Because, I just showed some basic examples to illustrate how you can eventually use the kits. But I wouldn’t necessarily use these setups for my work. For this final example we are leaning more towards my style. It’s fairly simple but effective. the kind of look I love, that creates a mood, a vibe, that adds a bit of mystery. I will only be using the two black flags to constrict my light and give it a shape and direction. This can be useful if you want to emphasize a certain part of the image, for me it’s more about the mood. Here is a version without the flags: And the ones with: Side by side: Easy to assemble and disassemble these will soon become important tools in your toolbox.The entire kit comes with its own sturdy bag, with multiple pockets that makes it easy to store all the different items. It’s solid and slim making it easy to store and carry around. I will most certainly use these in future sessions, use some of the basic setups I just showed you and even go further so look out for that. Huge thanks to GODOX for joining me on this tutorial. Do you wish to see more of these in the future?
- Dramatic lighting for Boudoir photography!
A familiar face! You’ve seen Célina before, and I praised her talents multiple times. She is not a dancer, nor a performer, but as a model she is able to improvise and propose a wide array of emotions, shapes and forms with her body unlike any other models I worked with before.
- Boxing photoshoot behind the scenes (part II)
Feat. Anissa Benyoub Part I was released a few weeks back, here is the link if you missed it: Boxing photoshoot behind the scenes (part I) I photographed 2 boxing athletes that day and shared one of the 2 sessions on Youtube. Both athletes shared the same scenes and setups, so their images are a bit similar. This is why I didn't include Anissa in the first video, and thought I would come back later on her session but with a bit more information and the motivation behind some of my decisions.
- FeiyuTech Vimble 3 - 3 Axis gimbal
the best companion for your phone!? I posted erratically on the channel, maybe you missed my boxing video ? My tutorial last week and filter test ? I had a really busy summer compared to 2020 and 2021, which isn’t a surprise but I was still overwhelmed by the events and overwhelmed by the work (I promise, I am not complaining!). I am currently giving the final touches to a dance video that will be released in a few days. So there should be more content as we approach September. We filmed some BTS footage for the boxing video, and used our phones for practical reasons. For better results and to facilitate the experience we used a simple yet effective tool: The Vimble 3, a 3 axis gimbal… and I thought you might be interested in my thoughts on this useful tool: Sometimes my 360° camera runs out of batteries, sometimes I forget it at home… and sometimes I want to create movements, shots that I just cannot make with a 360° camera. The feel and look ain’t the same and the experience is completely different. The advantage of the 360° is that I don’t need another person to operate it. I can film my BTS videos myself, film and worry about framing later. But once my camera is set, it doesn’t move, physically my camera stays in place… I can pan with the 360° footage, digitally zoom in and out… but that's it. The choice of using such a camera is to simplify the process for me. So when I don’t want or can’t use my 360° cam, what is the next most practical and easy tool I can use to film myself? The camera I always have with me... My phone! Years later, I am still doing it, it's great for direct posts on social media. Gimbals are now really common these days, they’ve been around for a while. Even your phone footage needs a bit of stabilization, it makes your videos look better. Enters the Vimble 3 by Feiyutech: Once I received it I tested some of the options I use the most on the app. 1/ AI tracking 2/ Basic walk and run 3/ The joystick and main buttons 4/ Manual controls with the FeiyuTech App When we filmed that boxing video , my assistant used the Vimble and her phone to film the majority of the Behind the scenes. If you are interested in seeing the full BTS, tell me in the comments. My assistant also used it during the filming of another project with another athlete a few weeks back. A very complicated shoot as it was windy… and you can actually see how much wind we had that day when looking at the water. The gimbal struggled a bit, the wind was very hard on the motors, but It still did a pretty good job given the extreme situation. A quick look at the menus and features: I love how easy it is to set it up. It takes literally seconds. It’s light, portable, I just regret it doesn’t come with a hard case. This tool unlocks new possibilities and gives you more freedom when you film with your smartphone. It smoothes out your footage, and make your videos a bit better especially when you are using an old Galaxy S9+ like me! I find it perfect for Vloggers, Youtube content, or any content made for the web. If you are into Reels or tik tok stuff (yes I am talking like an old man) you can switch to a vertical position really quickly and make your silly videos. At around 129 euros here in France… I find this piece of tech really affordable. This can really enhance the value of your footage, without investing too much. If your content is made for the web, your phone and the Vimble will be more than enough for your content. Learn more about the Vimble 3 on FeiyuTech's website . I have 5 BTS videos that I can’t release for now, because I am using gear I cannot talk about. I am hoping for a late August release… fingers crossed! To help you wait, I have a few unpublished sessions that are coming next week, and finally more content made specifically for my premium members that was created over the course of the past 6 months… I hope you are having a nice summer, take care, and until next time, have a good one!
- Using a spotlight for photography?
Review of the GODOX VSA-36K I am always looking out for new tools! To be creative? No, just to have fun… because I always feel like a kid every time I have a new piece of kit in my hands, even if it’s only for a limited time. I have used on multiple occasions an optical snoot , a cool accessory I strongly recommend. And if you don't know what an optical snoot is, it’s this fun tool that helps me create these custom shapes with my light, follow this link if you wish to learn more about it: The tool I never thought I needed. I often work with Continuous lights, it of course, depends on the project. I was wondering if a spotlight attachment like The GODOX VSA-36K could give me similar results to the optical snoot, and If I was able to incorporate this tool in my toolbox. This will be a 2 part video. This first part will be dedicated to photography and the other which will come out a bit later will be dedicated to my use of the spotlight for my film work. The thing is heavy, there is a lot of glass involved. That front part that lets you focus the light has to be manipulated carefully. When attaching it to a COB light that has a Bowens mount (note that this spotlight only accepts up to 300w led lights) the entire thing eats up a lot of space and is quite heavy. I am happy I did my first tests at home because the entire thing is not practical if you are used to moving your lights around. You know I work in a small room when I am at home so basically once the light was placed it pretty much didn’t move afterwards. But once it’s in place exactly where you want it, this is when the magic can happens. Marie-Line (Toulouse - France) Fujifilm GFX100s and GF 80 mm f/1.7 R WR 1/125sec f/1.7 ISO 320 The advantage of creating with continuous lights is to be able to see exactly how your light behaves on your scene. So when you are using gobos, when you shape your light with the spotlight, you can more precisely direct your model and shape your scene. Marie-Line (Toulouse - France) Fujifilm GFX100s and GF 80 mm f/1.7 R WR 1/125sec f/1.7 ISO 250 You don't necessarily have to use the spotlight and point it directly on your model. You can also use it to add depth into your scene, by crating shapes on your backdrops. Even if it’s just a hint. Marie-Line (Toulouse - France) Fujifilm GFX100s and GF 80 mm f/1.7 R WR 1/125sec f/1.7 ISO 400 The built-in cutting blades, already lets you create shapes without the use of GOBOS. Marie-Line (Toulouse - France) Fujifilm GFX100s and GF 80 mm f/1.7 R WR 1/125sec f/1.7 ISO 400 The Kit is sold with a few GOBOS, but there are many others available online. I am sure you will find the shapes you need, I personally got an additional set with some of my favorite shapes. I often slightly blur my shapes. It's really easy to do by moving forward or backward the lens. Marie-Line (Toulouse - France) Fujifilm GFX100s and GF 80 mm f/1.7 R WR 1/125sec f/1.7 ISO 100 For this particular session I used different lights with various colour temperatures, creating contrast with warm and cold lights. The GODOX VSA-36K was combined with the Aputure 300x bi-color led light, and I used 6 Godox TL120 Tube Lights during most of the session. Marie-Line (Toulouse - France) Fujifilm GFX100s and GF 50mm f/3.5 R LM WR 1/125sec f/3.5 ISO 160 There is no rule, you can mix strobes and continuous led lights to create your scene. I mixed the GODOX VSA-36K with other type of light sources. The following images are part of a past Fine art nude session I posted a few weeks ago: Fine art nude part III . Emma (Toulouse - France) Fujifilm GFX100s and GF 80 mm f/1.7 R WR 1/125sec f/1.7 ISO 320 What do these 3 separate sessions have in common ? The dark saturated tones, the high contrast, and the deep shadows. For this kind of look I find it easier to use led lights, as it helps me get the result I want much faster. The drawback is that I usually make shorter sessions with these lights because when there is one or multiple lights facing your model, they usually get eye fatigue pretty quickly. I am not sure I will often use the GODOX VSA-36K for portraits unless it is for this specific type of look. Using a flash with an optical snoot will be far more efficient for the type of portaits I create. More power, more creative options, and because of the size and weight spotlight attachement is also much more difficult to bring on location. Depending on the scope of your project, you might want to take these out for a big project! The packaging is pretty neat. Everything is well packed and secured in the included bag. It’s pretty well made and I feel confident in attaching a light on it. I feel GODOX has been making a lot of efforts lately in proposing quality products. I used the spotlight on video projects too, and this is where I personally feel it shines. But more about this in part 2!
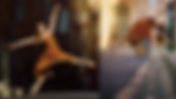
- Improvised Ballerina photoshoot
Feat. Penelope Scarian A promise is a promise, I only shared a small portion of this session in my first hands-on review of the CANON R3 . A simple, fun session, fully improvised in downtown Toulouse. Here is the full Behind the scenes video of this dance photography session! We were basically looking for light, shadows, and empty streets. Which is never easy even early in the morning. It wasn’t that early that day, and it shows since we were bothered a couple times during the entire session. I still don’t want anybody in my shots, I try to avoid it and photoshop people out when I am forced to. The ability of the CANON R3 track subjects and nail focus almost every time helped greatly. I haven’t worked this fast in a long time. Everytime I found something interesting, composition wise or because the light did something interesting we stopped. I explained Penelope briefly how and what I wanted to capture and with barely any rehearsals we tried to catch it. Once we had the shot we moved on. I used a Variable Neutral ND filter for a few of these images. The sun was hitting really hard at times so I needed that additional control on my exposure. For this session I used the Freewell Magnetic VNDs. Those shadows were easy to recover in post, which shows how good the sensor of the R3 performs. The entire session was made with 2 lenses: the RF 70-200mm F2.8L IS USM and RF 24-70mm F2.8L IS USM! I usually don’t like using zoom lenses but these 2 performed amazingly and were perfect for this session. Penelope Scarian (Toulouse - France) Canon R3 - Canon RF 70-200mm F2.8L IS USM 1/250sec f/2.8 ISO 320 at 115mm Penelope Scarian (Toulouse - France) Canon R3 - Canon RF 70-200mm F2.8L IS USM 1/500sec f/2.8 ISO 320 at 128mm Penelope Scarian (Toulouse - France) Canon R3 - Canon RF 70-200mm F2.8L IS USM 1/500sec f/2.8 ISO 200 at 86mm Penelope Scarian (Toulouse - France) Canon R3 - Canon RF 70-200mm F2.8L IS USM 1/320sec f/2.8 ISO 200 at 200mm Penelope Scarian (Toulouse - France) Canon R3 - Canon RF 70-200mm F2.8L IS USM 1/160sec f/2.8 ISO 250 at 108mm Penelope Scarian (Toulouse - France) Canon R3 - Canon RF 70-200mm F2.8L IS USM 1/132sec f/2.8 ISO 50 at 111mm 2 things worth noting: 1/ The choice of the dress is unusual for me as I usually recommend that dancers bring solid coloured clothing. 2/ She oftens smiles in the pictures, something I usually avoid... I often go for the serious "focused" look and stare. Things change, people change, I do let things happen a bit more these days, something I plan on doing more often in the future. Penelope Scarian (Toulouse - France) Canon R3 - Canon RF 70-200mm F2.8L IS USM 1/100sec f/2.8 ISO 100 at 168mm Penelope Scarian (Toulouse - France) Canon R3 - Canon RF 24-70mm F2.8L IS USM 1/1000sec f/2.8 ISO 100 at 24mm I also found this session liberating, as I didn’t have any additional accessories to carry around with me. This reminded me that sometimes less is more. The Behind the scenes of the boxing session partially made with the CANON R3 is coming soon. So be sure to come back on the blog regularly, or subscribe to the newsletter for a monthly update. Penelope Scarian (Toulouse - France) Canon R3 - Canon RF 24-70mm F2.8L IS USM 1/640sec f/2.8 ISO 100 at 24mm
- Karate photoshoot Behind the scenes
Feat. Cassandra Sampieri A place you may have already seen on this channel… And it might be the last time. A karate photoshoot inside the Château de la Reynerie. Not a well known landmark here but an interesting place to shoot in! Things are changing in the city of Toulouse, and the past 2 years locations have been reluctant welcoming photographers and filmmakers, unless of course you have a huge check in your pocket. Making these spaces completely out of reach for creators is a bummer. Small brands and companies that wish to create with photographers like me will have to dig deeper into their wallets, or find other solutions for their images. What can I say, what can we do? I guess nothing, we have to adapt and that's part of the job. I am still happy we got to make this last one there. Cassandra Sampieri is a young Karate athlete with a promising future and the goal of this session was to show different sides of her personality… Because yes, she is more than athlete! Athletes are not always super comfortable posing, especially when creating images not directly related to their sport. I have to say that Cassandra did a fantastic job. This session happened the day after I thought my GODOX flashes, the AD1200 pro and the Pixapro Citi 1200 pro died. The batteries seemed dead, I was pissed and had to find a quick fix for this shoot… only to realise 24h later that I just had to press that silly tiny button to wake the batteries. So if you own these flashes, know that if you don't use them for a while they automatically go to sleep! I jus wish I knew this earlier! So what I did, and you will probably see it in the BTS, I mixed 2 different brands of flashes. The Broncolor Remote has a hot shoe on top of it, which lets you stack another remote. And that’s what I did. I put a Godox remote on it and was able to work with 3 strobes for some images. Cassandra Sampieri - Château de la Reynerie (Toulouse - France) Fujifilm GFX100s and GF 50 mm f/3.5 R LM WR 1/125sec f/7.1 ISO 100 You've seen these a couple times before, when I have the time I like to create them at the very beginning of the photoshoot. It's a slow process, taking each individual shot takes time. But it acts as a warm up for the rest of the shoot. I get to know the athlete, I get to see how they move, which helps me greattly for the rest of the session. Cassandra Sampieri - Château de la Reynerie (Toulouse - France) Fujifilm GFX100s and GF 80 mm f/1.7 R WR 1/125sec f/2.8 ISO 50 These were the easiest ones to make. Classic poses, in a Kimono, I don't really have to direct her, she knows exactly what to do. Cassandra Sampieri - Château de la Reynerie (Toulouse - France) Fujifilm GFX100s and GF 80 mm f/1.7 R WR 1/125sec f/5 ISO 50 Of course we had to get a bit more creative, add some mood and play with this amazing location. I knew I wanted to do something with the mirror, I just wasn't sure how. It became obvious once she was up there. We only used one light for a dark contrasted look... It took me some time to find the right framing and angle to avoid my own reflection in the mirror. Down below are a series of portraits that are usually dreaded by my athletes. They are not models so you are taking them outside their sport, outside their comfort zone. An easy trick for me is to get rid of any unnecessary accessories. Two different approaches in the pictures down below. The first ones were made with only the light coming from the window. The last one with a flash placed camera left. To be honest, I prefer the ones without flash! Cassandra Sampieri - Château de la Reynerie (Toulouse - France) Fujifilm GFX100s and GF 80 mm f/1.7 R LM WR 1/125sec f/1.7 ISO 50 (No flash) Cassandra Sampieri - Château de la Reynerie (Toulouse - France) Fujifilm GFX100s and GF 80 mm f/1.7 R LM WR 1/160sec f/1.7 ISO 250 (No flash) Cassandra Sampieri - Château de la Reynerie (Toulouse - France) Fujifilm GFX100s and GF 80 mm f/1.7 R WR 1/125sec f/1.7 ISO 100 Only 2 images we made with a bit of smoke. You should now be getting used to it! It adds that surreal feel to the image, that touch of epicness. It also helps hide flashes that are in the way. The smoke for that high kick covered most of my light stand, so I didn't have to rely on Photoshop to get rid of it. Cassandra Sampieri - Château de la Reynerie (Toulouse - France) Fujifilm GFX100s and GF 30 mm f/3.5 R LM WR 1/125sec f/5.6 ISO 100 I just came back from Paris and Grenoble, so I had to skip a few posts on the blog and on YouTube. But I will be posting again tegularly quickly so don’t go too far. See y'all soon!
- How I make my BTS videos
Feat. the QooCam 8k by KANDAO VR The way I make my behind the scenes videos is fairly simple, but it took me some time to find the best way to capture these moments easily without the need of a sidekick. Thanks to one special tool, I am this close to making the BTS videos I want… alone! let’s dive into this. I do these to see my progress and for memories. My very first camera to help me make these was a Gopro. It did the trick for me back then for many reasons. They were small, lightweight and easy to handle. My only issue was that it took me out of my photoshoot everytime I had to turn them on and offf (to save the batteries) and frame my shot. Sometimes when in a hurry I would frame my shot poorly and end up not using the footage. And then I got the insta 360 ONEX ! Of course nothing can replace an actual talented individual with a camera by my side, but… this allowed me to film most of my sessions myself and keep most of the footage I shot. Now I can just take out the camera, turn it on when needed, and worry about framing later. I don’t film everything. I usually wait until that moment where I know we will get the shot, and film between 30 secs to 5min max. 5 minutes is already too much, this only happens when I am creating something a bit complicated, when I am adding accessories (like smoke or fabrics), or when we struggle making a shot. The quality of the images from the INSTA 360 cameras is good, but I needed an upgrade. A bit more resolution, 10 bits 422, I mean the basics to make it watchable on the tube. So I waited a bit before upgrading my camera. Surprisingly, instead of choosing one of INSTA 360’s newer models, I went for the Qoocam 8K by Kandao VR. QooCam 8K at a glance: 1/1.7 ’’ 20MP Sensors 7680 X 3840 at 30fps ∣ 10bit ∣ H.265 200Mbps (max) 3840 X 1920 at 120fps 6-axis gyro, IMU sensor and advanced stabilization Realtime RAW Mode (photos) 2.4” Touchscreen Built-in 3000mAh battery Built-in 64GB internal memory External SD card support (up to 256GB) I still consider this camera and upgrade from my ONEX although it is a 3 years old camera. So why did I change? Better image, better low light capabilities, more details thanks to the 8k sensor and better ergonomics thanks to that huge screen. The downsides: Their software still needs some improvements. Adding that extra step for stitching is not ideal for quick edits. Because that’s how it works. You use Kandao’s software to stitch your 360 footage, render it in Prores 422 and then you open it in Davinci resolve (for example) with the help of Karta VR (Thank you Andrew!) and do your framing and camera movements there. This is currently my workflow, I do all the edits of my Youtube videos directly in Davinci Resolve! Some of you asked me where I get my music for my video. I used to rely heavily on Artist.io and I’ve been testing Audiio the past weeks. These platforms offer license free music… and I have to say that these sound libraries have evolved in a good way the past few years. I will make a review of my experience with the platform Audiio in a future video. Once I chose the music, the beat, the rhythm and the vibe of the song will guide me for the edit. This is how I decide where the stops and acceleration will occur in my footage from the QooCam 8k . I usually do not grade my footage for my BTS now, I just do some minor corrections. I show you what I want you to see, and choose the clips that summarize the photoshoot best. I also do my best to show where the lights were placed and the amount of interaction I have with the models. I wish I could add the time to add the audio. I know it’s possible, but the amount of work this requires in post will make it impossible for me to propose these videos regularly. Did I make a mistake by switching to the QooCam 8K … we’ll see. Since this camera is now a few years old, I want to believe that there will be an upgrade soon, that will get me even closer to the type of image I want from such a camera. Better dynamic range, better battery life, and better software would be great! If Kandao could make their own plugin, in order to do the stitching, framing and camera moves directly in Davinci resolve, it would be awesome! If they can also make it 12k without changing the size of this then it would be a dream… because 8k sounds a lot, but in reality it is 4K for each lens. And when you zoom in and out like I do, it looks great in 1080p but if you wish to deliver in 4K... You know the story! Don't get me wrong, it's a fantastic camera! I Love the design, the size and weight, so from now on this will be my Goto BTS 360 camera. I still have a few videos filmed with the ONEX but the QooCam 8k will soon take over in the weeks to come. Check them out on their official website, they make other cool tools for creators, and professionals: https://www.kandaovr.com/
- Finally an affordable and useable EVF?
Review of the Portkeys LEYE II (HDMI) If you regularly watch my BTS videos you already know I rarely use tilted screens or monitors when I am operating. For photography I love the viewfinder… and for video too… The last Electronic View Finder I had in my hands didn’t do it for me. So I was reluctant to make yet another review of another affordable EVF. But I still find it interesting to see where things go, and if for us broke creators there are brands out there that create tools with us in mind. So Let's take a closer look at the Portkeys LEYE II I’ve worked with different EVFs in the past and most of the ones I enjoyed working with were way off budget for me. The latest one I had was from Kinefinity for their latest MAVO 6K. I truly enjoyed it but at over 1999 Euros, this is something I definitely can't afford right now. I guess that you get what you pay for! But the thing is if you strip it down to the bare essentials, and if you make a simplified EVF aimed at content creators. Not every project needs the speed of an SDI connection. Is it really hard to get something stripped down, affordable and worth using? Here is the Portkeys LEYE II at a glance: Display: 2.4-inch LCD, 1440x900 Resolution 8 bit Color Depth 1100:1 Contrast 300nit Brightness ARRI Positioning Nato Rail & 1/4 Threaded Hole Red Oak Diopter Swivel +8D~-3D Adjustable diopter Supports DCI 4K HDMI DC Power 7~24V USB 5V or CanonLP- E6 Battery (Not Included) It’s small, it’s light, you can attach it almost anywhere without worrying about breaking the hot shoe of your camera. Because basically this is what this is, I believe it is aimed at all you DSLR, DSLM users that want to have a decent EVF for your video rigs. The viewfinder has an HDMI input and can support up to 4K30p video. The 2.4″ Screen size LCD EVF has a 1440x900 effective resolution with 8bit Color Depth, and 300nit Brightness. You now have at your disposal, focus peaking, zebra, waveform, histogram, and vectorscope functions… and more. The diopter of LEYE is adjustable from -3 to +8, which for people like me who don't see much without glasses allows us to operate the camera without them. I power it with an LP6 battery, because I have a lot of them laying around. I tested it quickly with the CANON R3, the CANON R5 and Fujifilm GFX100s. It is really easy to use, I didn’t have to dive much into the manual to make it work. I surprisingly used it more than I thought I would for some of my recent YouTube videos. The resolution is pretty good at this price, and the different options do help you nail your focus and exposure. Given the price point, and my bad history with affordable EVFs I was pleasantly surprised. It is actually a useful tool for anyone out there in need of a compact EVF for their mirrorless cameras, or any cameras who has a HDMI output. It is hard to complain when we look at the price. At around 399 Euros here in France, they managed to make a good entry level EVF. The only thing I noticed that I wasn’t happy about is the round sponge eye mask. That sponge mask is supposed to prevent direct sunlight from burning the LCD screen, and probably there to make the eyepiece more comfortable too. The thing is… it looks cheap and fragile. This part alone straight out the box makes the EVF look bad in my opinion, and Portkeys would have made a better decision choosing a different material for this. I am not sure this will stand the test of time to be honest, and maybe this is why they included an extra sponge in the package. It’s a shame because the EVF in itself is well made, and I am sure a lot of people will find it useful especially in situations where using a screen is impossible. Portkeys doesn't only make EVFs, they actually also make monitors… and more! If you are on a tight budget, be sure to check them out, it might be worth your time: Portkeys.com
- Improvised sensual Boudoir photoshoot
Feat. Frany Duran This improvised sensual boudoir photoshoot happened during my very short stay in Paris, a few weeks ago. I just decided to open a spot for a quick session and Frany jumped onboard and was game for an unprepared session. We met, discussed briefly about what we can eventually do together. I discovered the outfits on the day and we started shooting right away! The short exchange we had prior to shooting is important. It was my first time working with her, so it was really important for me for this type of session to know that we were on the same page. For this trip, I had with me an unusual strobe. The Elinchrom ONE… That I nearly broke the next day when it fell off the bed and hit the floor. I never did a review of that light because I knew I wouldn’t use it much. But the light has some features no other light of this kind has so I might change my mind and do a review… months after its release. For this session we relied on the dying light coming from the window, and when it became too dark I used the Elinchrom ONE.
- Boxing photoshoot behind the scenes
Feat. Ambrine Photographing athletes has always been a favorite of mine. I’ve been away from this genre for some time and I was happy to have the opportunity to get back to it for this session. I had 2 athletes that day, but we will only concentrate on the portraits I did with Ambrine. It all happened during the time I had the Canon R3 … so I couldn’t resist taking it out of the bag for a few shots. It was inevitable! Although there are a few tricks to capture action and get sharp images with a camera that isn’t made for sports like the GFX100s. Why make things complicated when you have in the bag a tool that is made for action. So that’s what I did, every time I needed to capture my Athlete in motion. The speed, the track focusing abilities of the Canon R3 made it easy. Ambrine (Toulouse - France) Canon R3 - Canon RF 70-200mm F2.8L IS USM 1/200sec f/5 ISO 100 at 86mm Ambrine (Toulouse - France) Canon R3 - Canon RF 50mm F1.2L IS USM 1/200sec f/5 ISO 100 The location was a hard one. There is not much going on and not much light coming in. Although I used strobes, I still wanted people to feel when looking at my images that the light was maybe coming from the windows… It’s a huge "maybe" because ultimately, I broke that rule a couple of times. 2 lights were used for this session, the Godox AD1200 pro and the Pixapro citi 1200 pro . I used them with 2 different light modifiers. The Godox Parabolic P128 was used as my main light, and the Phottix Raja stripbox as a side or back light. It is not the first time I use this 2 light set up for an on location session. It is not hard to guess when the R3 was used. It wasn't really hard for me to match the look of my images with these 2 cameras. Ambrine (Toulouse - France) Fujifilm GFX100s and GF 80 mm f/1.7 R WR 1/125sec f/5.6 ISO 50 Ambrine (Toulouse - France) Canon R3 - Canon RF 50mm F1.2L IS USM 1/200sec f/5 ISO 100 I was not looking for realism here. My main goal was to minimise the environment as much as possible. Usually I have the opposite approach, but I really wasn’t a fan of the place. This is where accessories come in handy. Add some visual interest in the foreground, and near the athlete. Shoot near objects, shoot through elements, use anything you can on location. Or, you can add heavy smoke for a surreal look like me. I know I am doing this a lot these days, but that's how I work. Once I will get sick of it, I will do it less, and my use of smoke will become more subtle. Ambrine (Toulouse - France) Fujifilm GFX100s and GF 80 mm f/1.7 R WR 1/125sec f/6.4 ISO 50 Ambrine (Toulouse - France) Fujifilm GFX100s and GF 80 mm f/1.7 R WR 1/125sec f/6.4 ISO 50 Ambrine (Toulouse - France) Fujifilm GFX100s and GF 80 mm f/1.7 R WR 1/125sec f/6.4 ISO 50 In my first hands-on review of the Canon R3 I mentioned 2 athletes… Since they took turns for each scene, I didn’t want to share both sessions in one video. Because although they are 2 different athletes and represent 2 different generations, their images have a very similar look. Still, I will share the other session in a future post for premium members , and to make it interesting because a lot of the footage will be very similar, I will add a few lighting diagrams and additional details on my lighting approach. The 2nd athlete was also the subject of a short video portrait I made recently, so be sure to look out for this one! Am I missing action, sports photography ? Yes, and no… I will go where my heart tells me to go, and for now I am good where I am. I can still rent an action camera when I need one… so we’ll see further down the road how things evolve.